In a Canvas app, if you pick up a CDS entity as a data source, in my case, a Contact entity, you can also pick up a view.
If you pick up None as per screenshot below, it will retrieve you an unfiltered set of records.

Here you can see all my CDS contacts in the gallery.

Let’s say we want to use a custom view to pre-filter our data in the Canvas app. Why it’s good? It looks like something you could use for consistency.
Setting up rules on CDS will allow you to modify it in one place in the future if you decide to change filtering criteria. If you use the same filtering rules to define your data source in multiple apps, including model-driven, instead of defining those rules in each app, you could do it once in CDS.
Let’s see how it works. Let’s create a view for all contacts in the system working for the Chocolate Factory company. In CDS -> Data -> Entities for a Contact entity click on Add view.

Here we define columns, sorting rules and filters.

For the filter, we add “Company Name contains ‘Chocolate Factory’” and save. We have to publish changes in CDS.

Then in our Canvas app, we select a new view we’ve just created from the list of available views.

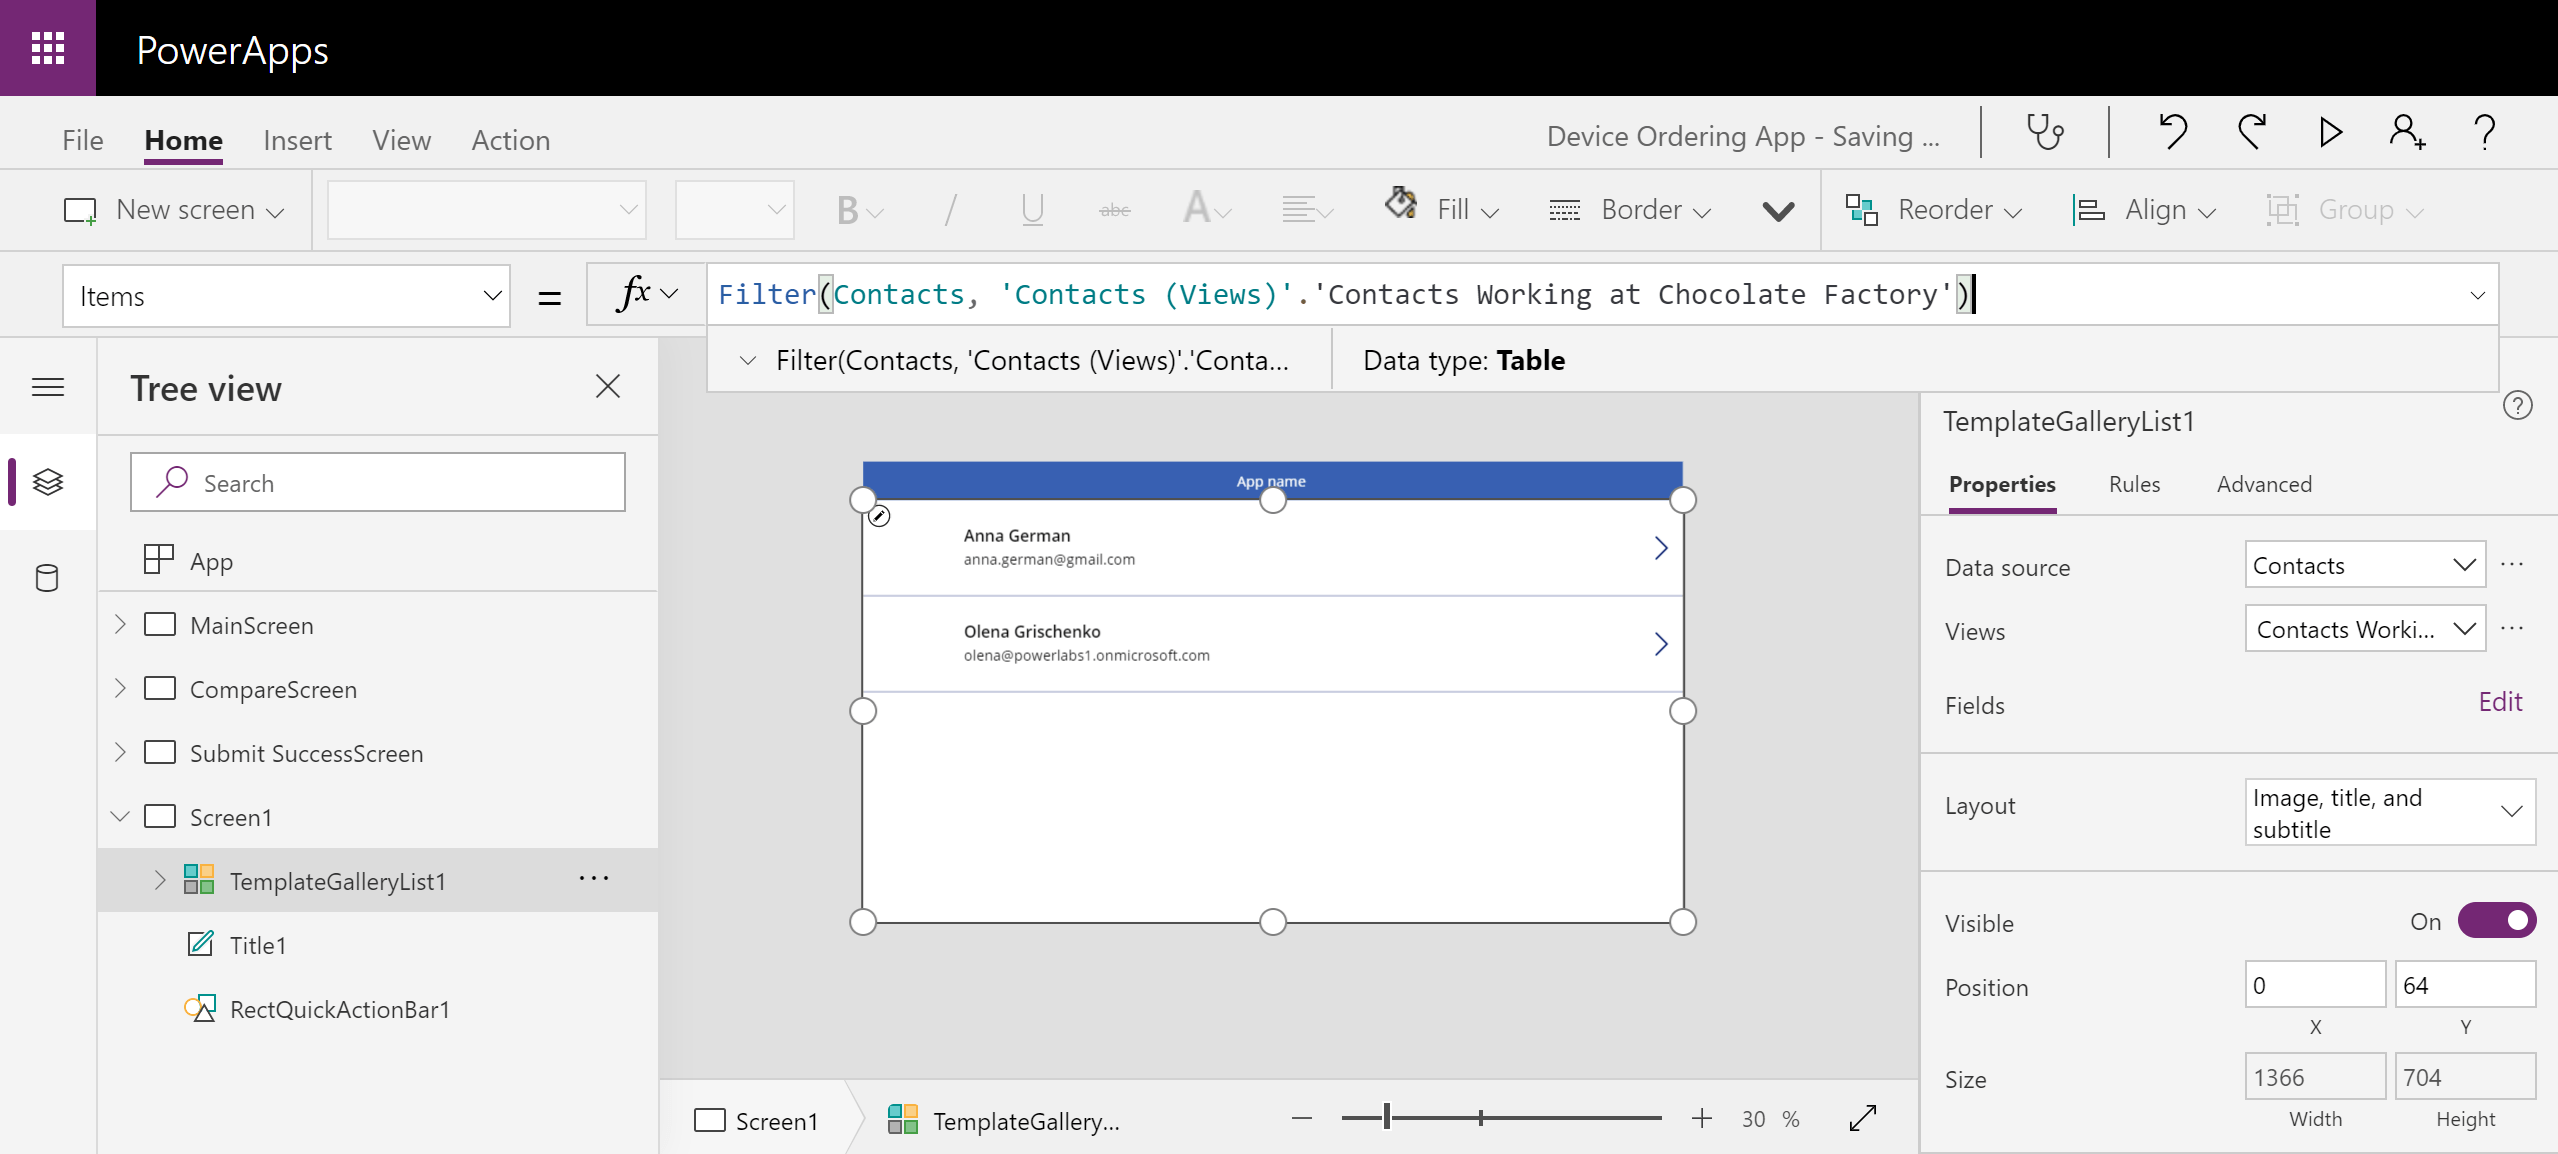
As you can see, data gets filtered to only display contact with the Company Name set to “Chocolate Factory…”. Note gallery property Items expression is:
Filter(Contacts, ‘Contacts (Views)’.’Contacts Working at Chocolate Factory’)
Now if you want to change the filtering condition for your data source you don’t need to change your app.

Leave a comment