• Microsoft Entra ID connector – least privilege

    The solution described in the article is not fully working to the level it satisfies the author. It’s a continuous effort to come up with the best solution that meets both dev and ops requirements.

    Me

    The problem

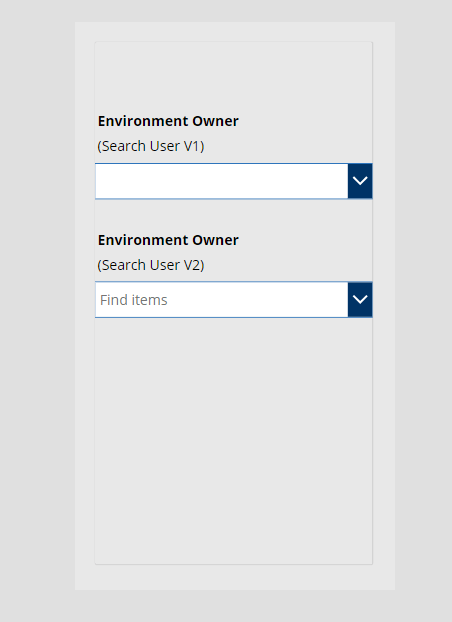
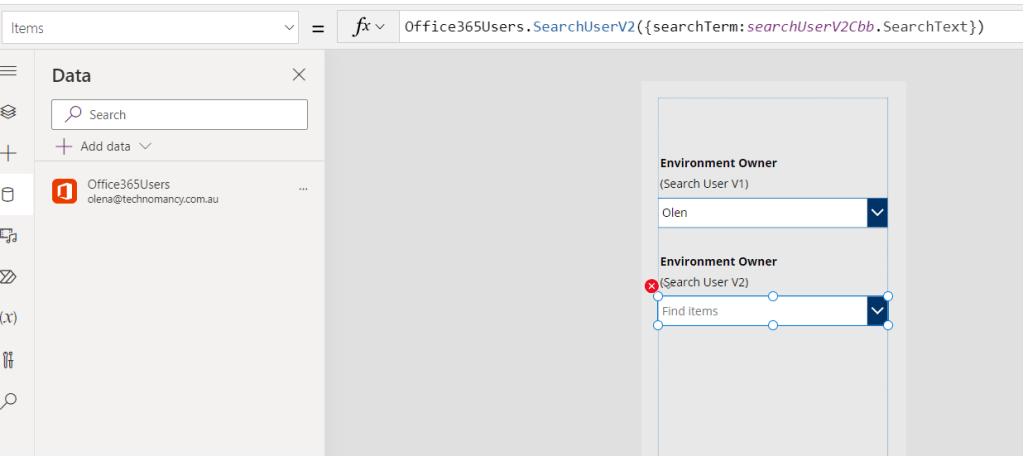
    I am trying to create a security group using Power Automate using the Microsoft Entra ID connector.

    https://learn.microsoft.com/en-us/connectors/azuread/#create-group

    Microsoft Entra ID is an Identity and Access Management cloud solution that extends your on-premises directories to the cloud and provides single sign-on to thousands of cloud (SaaS) apps and access to web apps you run on-premises.

    https://learn.microsoft.com/en-us/connectors/azuread/

    To use this integration, you will need access to a Microsoft Entra ID account with sufficient privileges. To make a connection, select Sign In. You will be prompted to provide your account information and follow the remainder of the screens to create a connection.

    To use the Microsoft Entra ID connector, the account needs to have the following administrator permissions:

    Group.ReadWrite.All
    User.ReadWrite.All
    Directory.ReadWrite.All

    To create a security group we need

    Group.ReadWrite.All

    OR

    Directory.ReadWrite.All

    The connector requires

    Group.ReadWrite.All

    AND


    Directory.ReadWrite.All

    There is a clear difference between these two which makes us want to choose the Directory.ReadWrite.All permission (deleting security groups doesn’t sound right so, no)

    Permission references: https://learn.microsoft.com/en-us/graph/permissions-reference
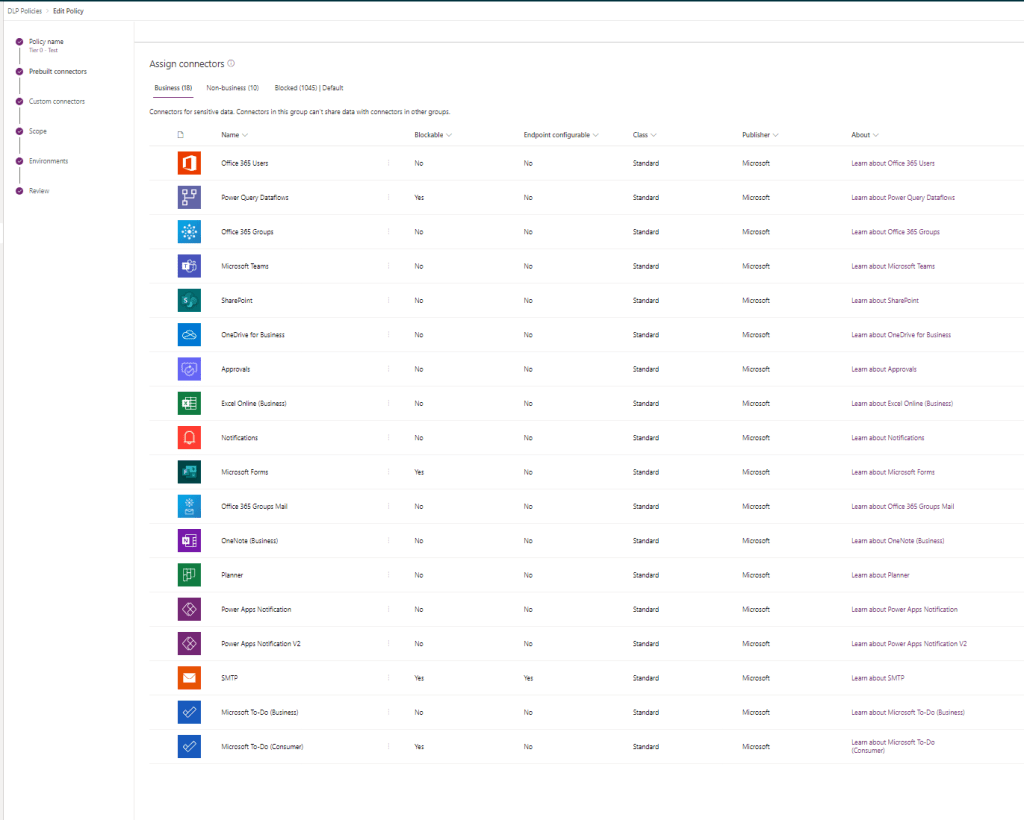
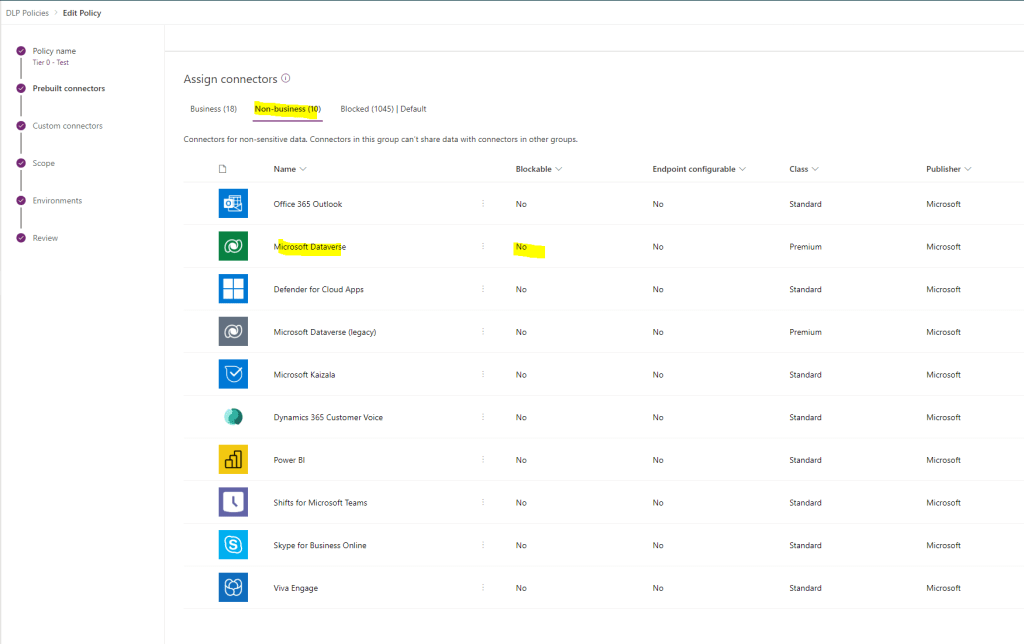
    Assumption

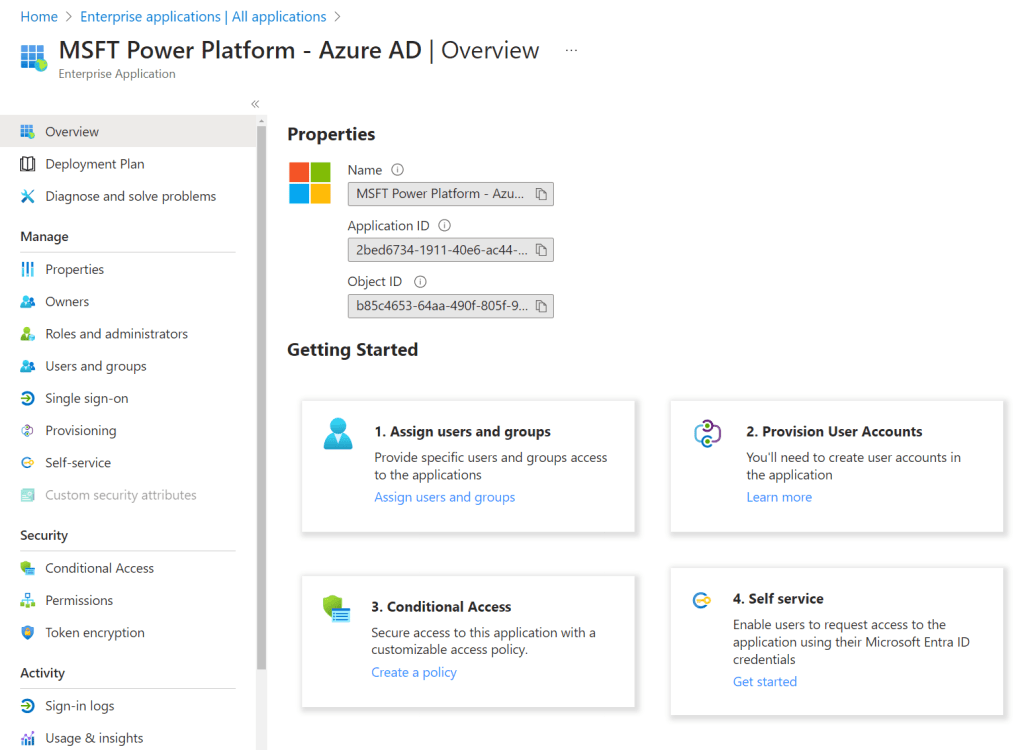
    Let’s assume there is a way to limit the connector permissions via the enterprise app it uses to perform the actions on a user’s behalf.

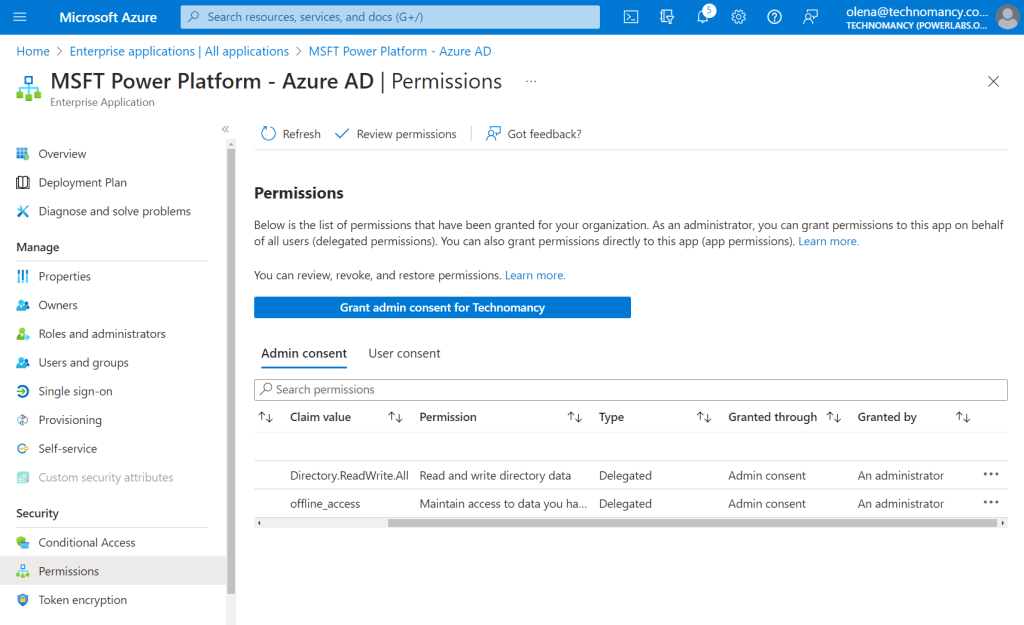
    The app gets created auto-magically by the connector. You can find it under Enterprise applications on the Azure portal:

    The original set of permissions:

    We want something much lighter for the permission list. Something like this:

    This image has an empty alt attribute; its file name is image-24.png

    Set up

    I created a new user in my organisation. Peter Pan doesn’t have any admin privileges or super security roles. So it will be good for the testing.

    Testing

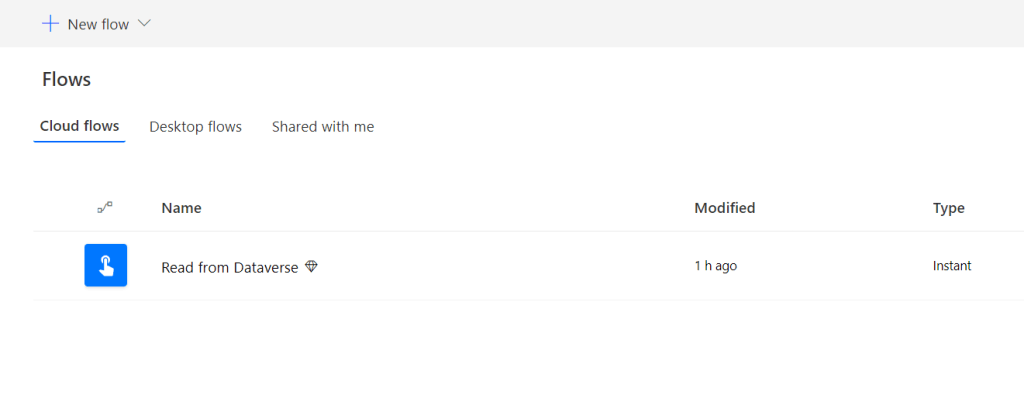
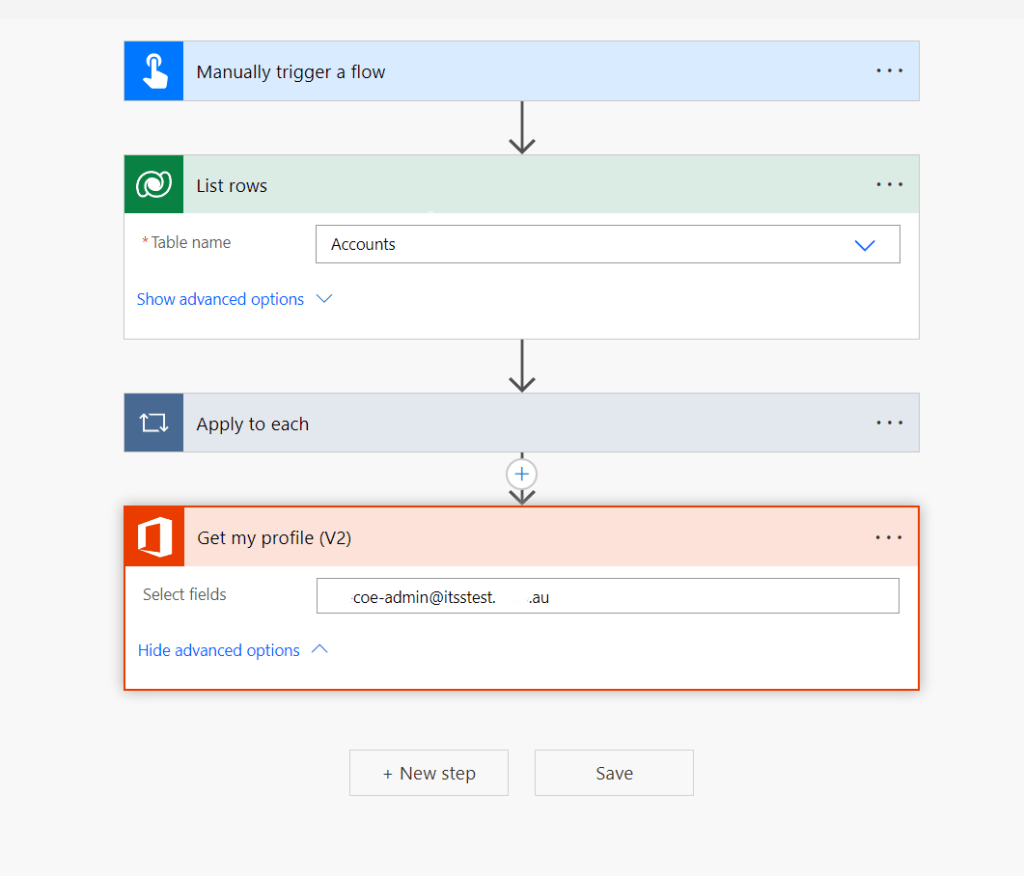
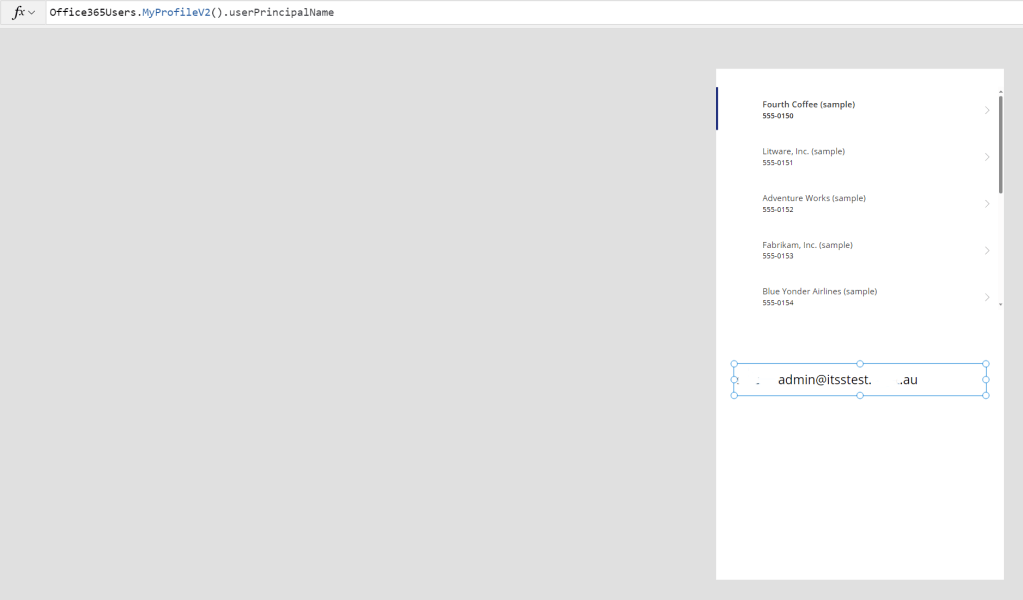
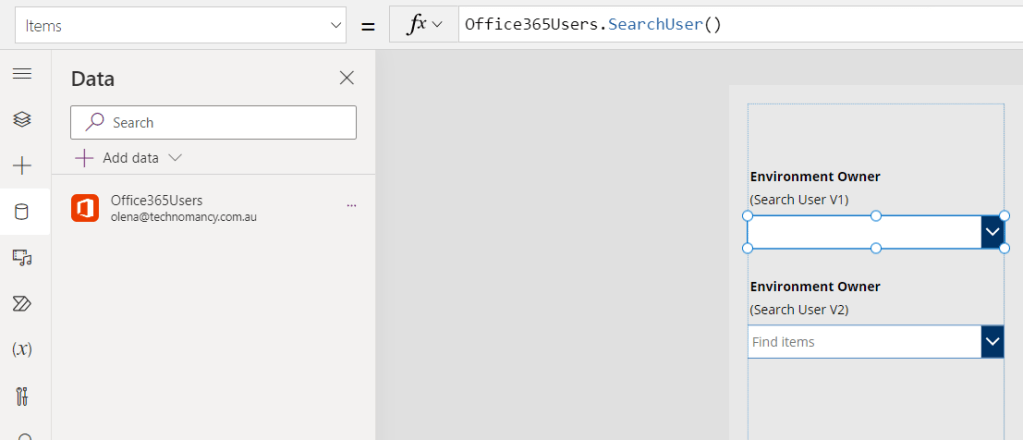
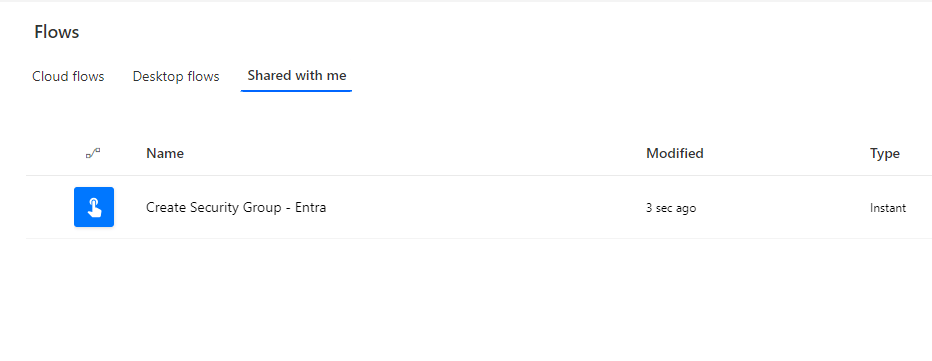
    I created and tested a Flow and then shared it with Peter Pan:

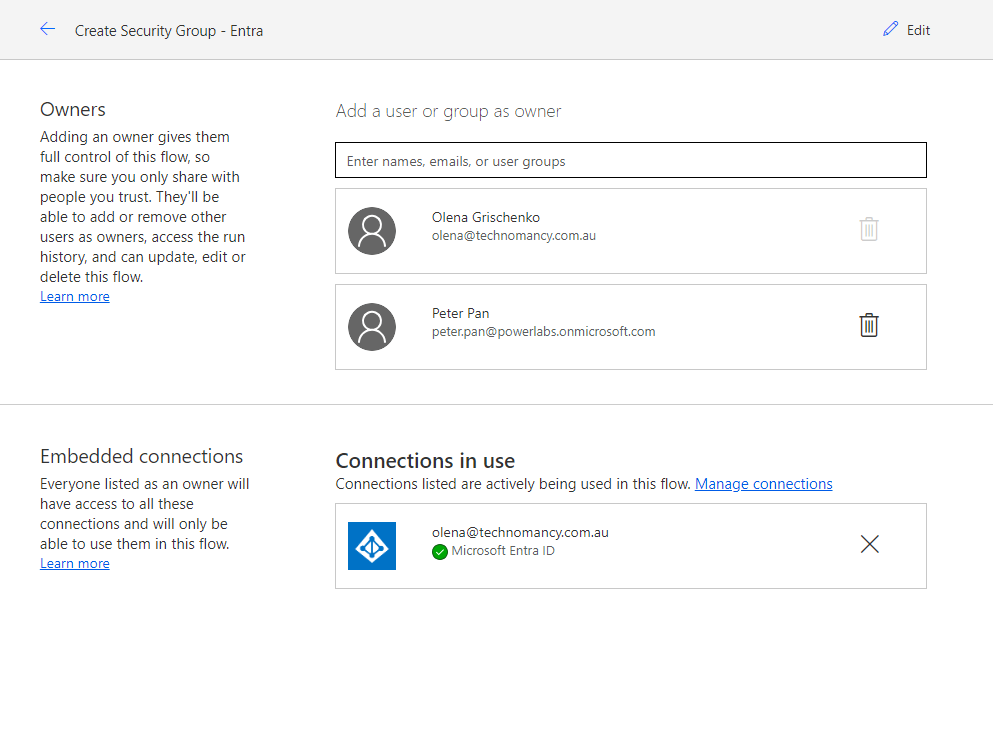
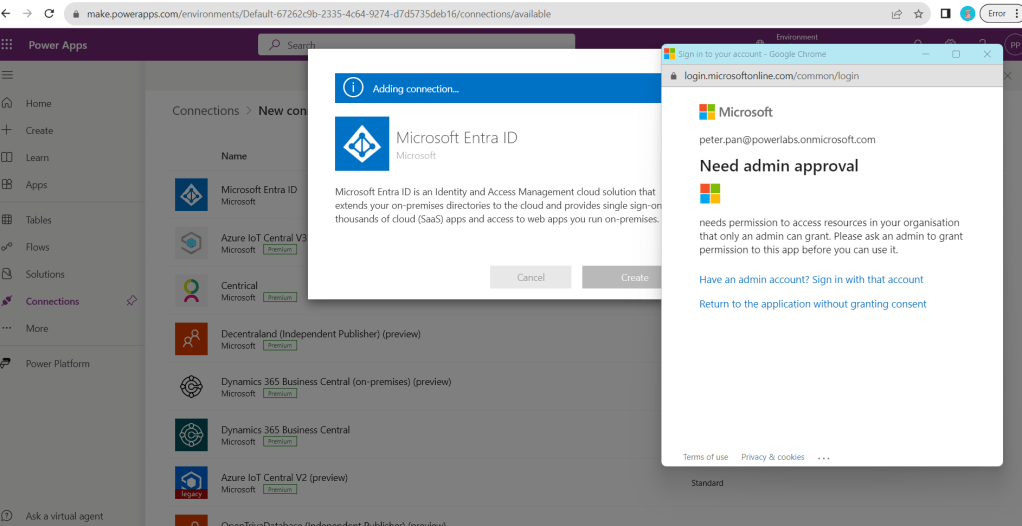
    Although Peter has access to my connection I want to create another connection just for him.

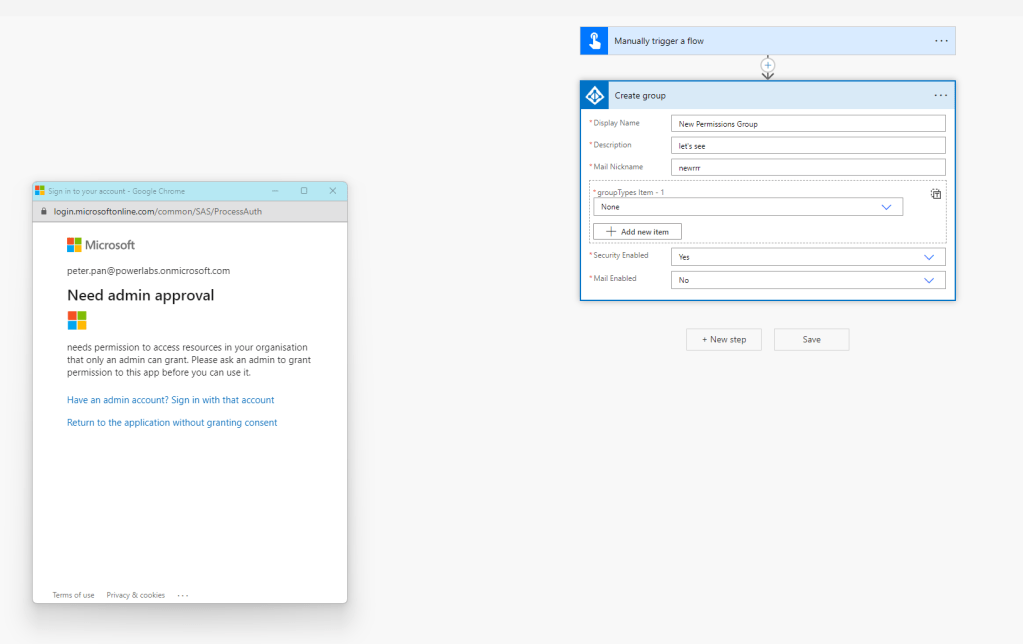
    To give the admin approval I had to log in under my admin account.

    Now Peter is listed as a user of the Entra ID app.

    Unfortunately, it reverted my changes and added back the permissions I tried to remove.

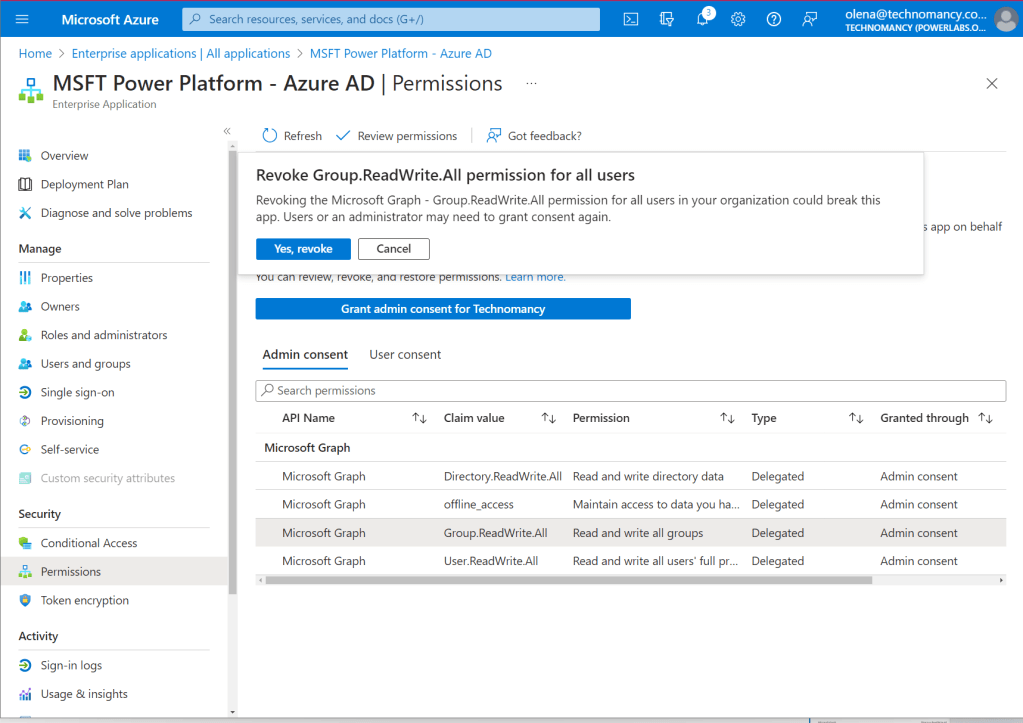
    Seriously, I didn’t ask for it!

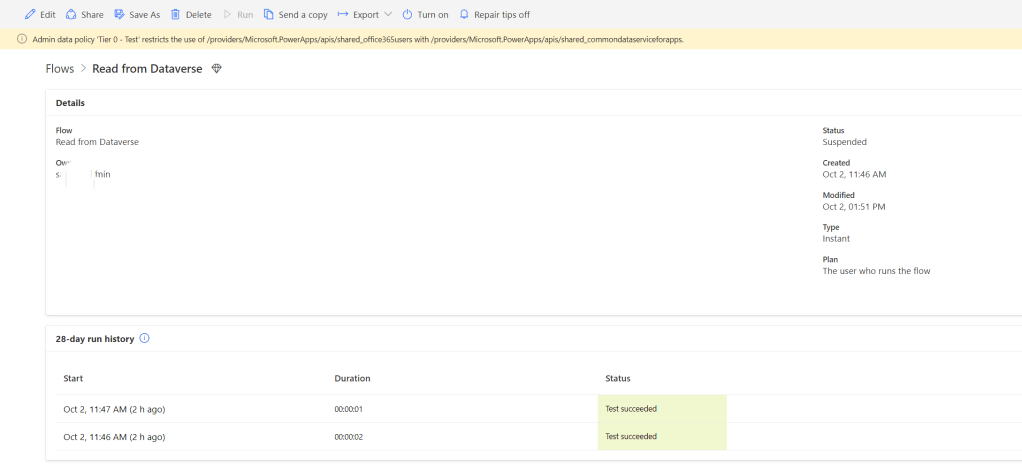
    After removing the excessive permissions for the second time I run the Flow to make sure the connection is working. It is working!

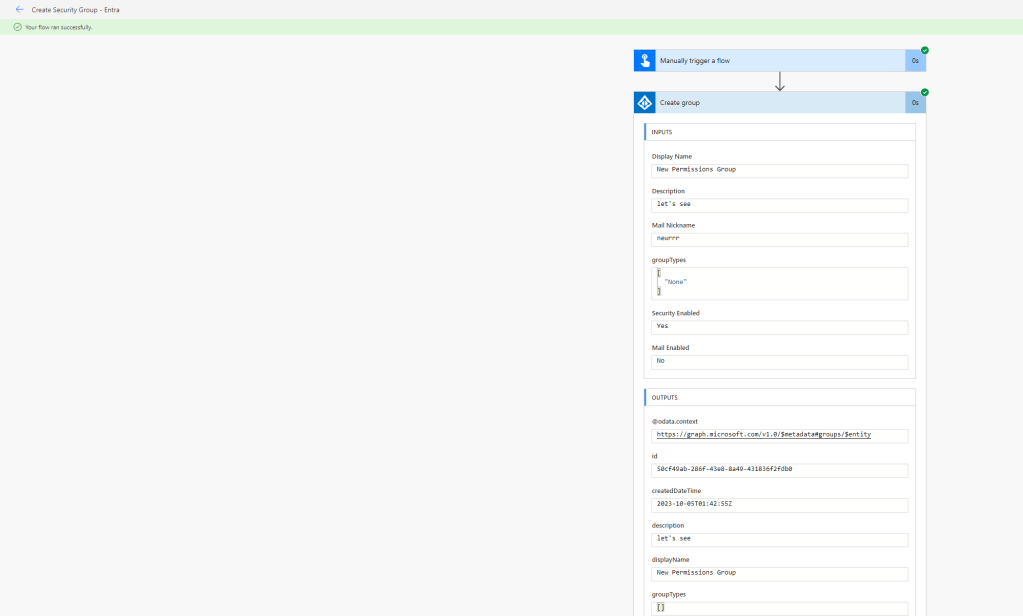
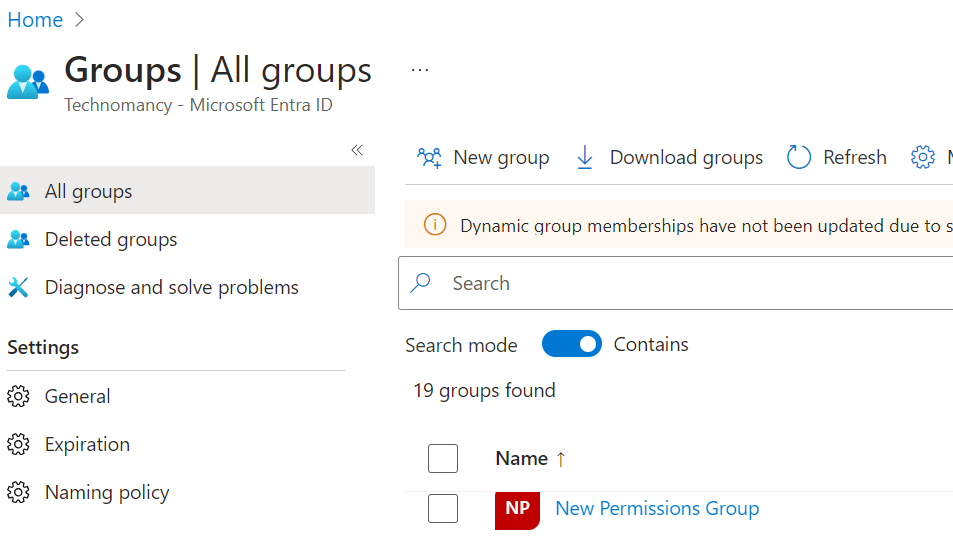
    The group was created and looks the way it is supposed to look. So – Yay!

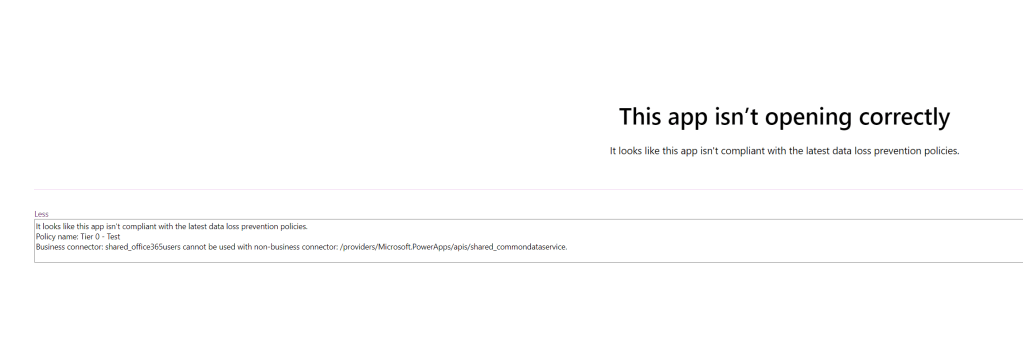
    Does it mean we won? Yeah… Nah!

    If we need to create another connection or another user needs to create another connection it will get us to the same authentication/authorization flow. Which is very unfortunate!

    Microsoft! Why?!

  • Cancelling Dataverse via DLP policy on the Default environment

    Let’s chat about how we got there first.

    In my client’s organisation the decision was made to limit Power Platform usage to just Office 365 connectors due to the complexity of the service ownership, time-consuming licensing discussions – it’s complicated! So Power Platform is only allowed as a part of the Office 365 subscription, all users in the organisation are covered by their Office licenses – no Premium, no extra costs. Happy days!

    Limiting Power Platform full power is as simple as just not letting people use Premium licenses. Not for the existing stuff, but for future projects. This is where it gets complicated. But wait, there is more!

    And what about the Default environment?

    “Every employee in an organization that uses the Power Platform has access to the default environment.” – says Microsoft documentation. Every employee mentioned above also has a Maker role which allows them to create apps and Flows and also try Premium things.

    Previously we didn’t manage the Default environment so now we’ve got all sorts of Flows and apps with the Standard and Premium connectors mix.

    Now we want to start managing the Default environment and stop users from using Premium(Paid) connectors. Let’s test how it’s going to look like first to be safe!

    https://learn.microsoft.com/en-us/power-platform/guidance/adoption/manage-default-environment

    The first step would be to cover it with the relevant DLP policy. If you are not familiar with the concept, please read the article below:

    https://learn.microsoft.com/en-us/power-platform/admin/prevent-data-loss

    Let’s create a DLP policy, we called it Tier 0. In the policy, we add only allowed Office connectors to the Business bucket, keep non-blockable connectors in Non-business, and block the rest.

    What we immediately notice, if we haven’t thought of before, is that Dataverse connector is non-blockable therefore it can’t be blocked and it remains “in use” just not permitted to be mixed with Business Office 365 connectors we selected. It’s a very important discovery for our further investigation.

    Our Default environment has database enabled so it has Dataverse. What does adding Dataverse to Non-business connectors mean to users’ Flows and apps? Let’s have a look!

    I saved the policy pointing to the test environment first as I have to do some work before I apply it to the Default environment.

    I am using a Test tenant where I created a database on the Default environment as we have it in our production Default.

    I created a test Flow with Dataverse and “Office” connector. I expect it to break when I apply my policy to the environment.

    I would like to create a Canvas app to test what it looks like for apps. I added both “Office” and Dataverse data sources to the app.

    It’s time to apply the Tier 0 DLP policy to our test Default environment.

    The results of the testing are below:

    Our Flow with two connectors got suspended. If you open it you will see the error message telling you why.

    The app is broken too. It didn’t happen instantly as with Flows but it did happen eventually.

    Does it mean we cancelled Dataverse on the Default environment?

    NO!!!

    For apps and Flows only using Business “Office” connectors or Non-Business Dataverse connectors, nothing is going to change.

    We can’t cancel just Dataverse app or just Dataverse Flow. The rules are followed so nothing is going to change.

    What about model-driven apps with Dataverse? In theory, these apps shouldn’t be affected. If your app has automation mixing connectors from Business and Non-business buckets they will break.

    What about…

    I think I will do a separate post about model-driven apps.

    And another one exploring different possibilities of canceling things. As much as I love enabling things, making sure you have control is an important part of the adoption, surprisingly.

  • Canvas App: Office365Users.Search UserV2 not working, but V1 does

    Scenario:

    Currently, I am working on the New Environment Request app. As a part of the solution, we add the environment business Owner which as we know is different from the Owner field populated by default with the name of the user who physically spins the environment.

    Therefore, on the form, we allow a user to pick an Owner from the list of users.

    Solution:

    We will use Office 365 Users standard connector: https://learn.microsoft.com/en-us/connectors/office365users/

    It has a SearchUser method and we will work with it. I suggest watching Shane Young’s video which I put at the bottom of the article. It explains everything in detail.

    For my own reference, I put the steps below. Some things are a bit different as I use the most recent controls and connectors.

    As I followed the video, I started with version 1 of the method to simply get it working. Then I moved to V2 as we always try to use the latest available API, methods, and connector versions to ensure we don’t have to update our formulas too soon.

    Office365Users.SearchUser (V1)

    I put 2 combo boxes on the form and marked them to make it clear.

    I added a new data source. Populating data from the Office 365 Users connector.

    I linked the data source to the first combo box.

    I used a formula called the SearchUser method to populate Items.

    On the Properties panel for Fields Layout, I selected Double to display not only Display Name but also UPN field to differentiate users with multiple accounts. I used Display Name as a search field.

    If you watched Shane’s video, he is using an extra Input control for the search. I don’t. My formula looks like this, I pass the search text as a parameter to filter the dataset:

    Office365Users.SearchUser({searchTerm:searchUserV1Cbb.SearchText})

    Use the following settings to make it look cleaner and enable searching of course.

    The result looks nice! As you could see, there are multiple accounts for Olena so having a second row with UPN really helps.

    OK. It’s done! Let’s move to V2. What could possibly go wrong!

    Office365Users.SearchUser (V2)

    Copy/paste. Changing the method to SaerchUserV2…

    Office365Users.SearchUserV2({searchTerm:searchUserV2Cbb.SearchText})

    I don’t like the red cross icon. Do you?

    Also, my fields! There are no fields available for selection. What’s going on?!

    Well… TDH it took me a bit of a time to figure it out. The Checker doesn’t say anything helpful. But the actual red cross icon hover text does!

    Looks like the format of the result retrieved by the method is changed. Let’s have a look at it closer!

    The method retrieves a Record. We need a Table instead. The Table required is stored in value.

    Now it’s all easy! We correct the formula to give us the Table like in the code below.

    Office365Users.SearchUserV2({searchTerm:searchUserV2Cbb.SearchText}).value

    The red cross icon disappeared! Good!

    Now we could select display fields and a search field.

    And it works in an awesome way!

    Shane Young Appreciation Note

    I would like to express my respect and admiration for Shane Young for doing so much for the community. His video tutorial saved me a great amount of time and effort.

    PowerApps Office 365 User Search
  • Co-pilot with Power Pages: new features to generate UI
  • Power Automate: Send approval email to external customer

    To remind myself for the future discussions. Thank you very much, Mira!

    miraghaly's avatarMG

    #Power automate #Approvals #External Guests

    Approvals in power automate are very nice interactive feature to process requests and documents!

    They can be integrated with CDS, SharePoint online and Onedrive.

    Here is a link to creation of Approvals walk-though when an item is created in a sharepoint list!

    https://docs.microsoft.com/en-us/power-automate/modern-approvals

    What about sending Approval to External Guests … People outside your Organization?!

    Well you can send to External Guests … But they need to belong to another Tenant and you have to invite them through the Azure Active Directory … What about i need to send an approval to my client to approve and Invoice but this client does not belong to a Tenant? … Still there is a solution … A Fancy Action called “Send Email with Options “

    Well it is very Simple to use!

    So on a specific Trigger when a new record is created/ Updated , say invoice…

    View original post 116 more words