Skip to content

Olena's Dynamics Blog (post-AI)

Writing as a human

  • Home
  • About
  • Contact
  • Videos
  • YanaLiz Blog

recent posts

  • !Importan! This blog is now an archive
  • How to send email receipt from Stripe in Power Pages payments
  • D365 user queue: control which emails are synced. Default to No email messages.
  • Integrate eSignature with Power Pages
  • Power Pages: Upload large files – work in progress

about

#womenintech #mvp #businessapplications #dynamics365 #dynamics365developer #powerplatform #solutionsarchitect #businessapplications #netdveloper #azuredeveloper #lovewhatido #supportwomenintech #blogger #diversity #microsoftdeveloper
  • Twitter
  • Facebook
  • Instagram
  • ❤Dataflow❤ with Power Apps: bulk update for CDS records

    ❤Dataflow❤ with Power Apps: bulk update for CDS records

    November 12, 2020

    This article is using a test data because using customer data is wrong. The rest is very practical stuff. If you don’t use Dataflow for Power Apps still I think you should.

    I am trying to solve a typical problem. We’ve got a Choice column Business Type for Account (for example). We need to remove one of the choice items “Re-seller” from the Choice but first we need update all related records using this item.

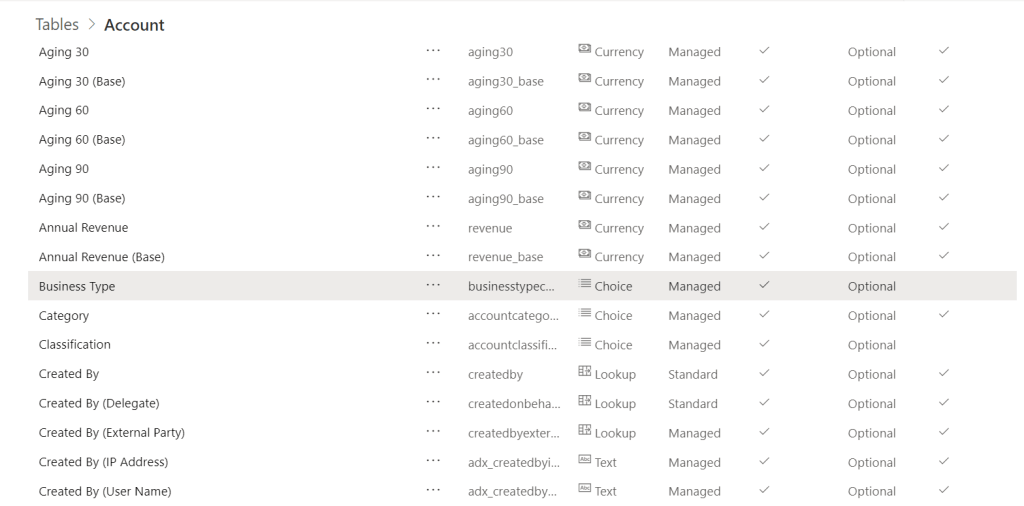
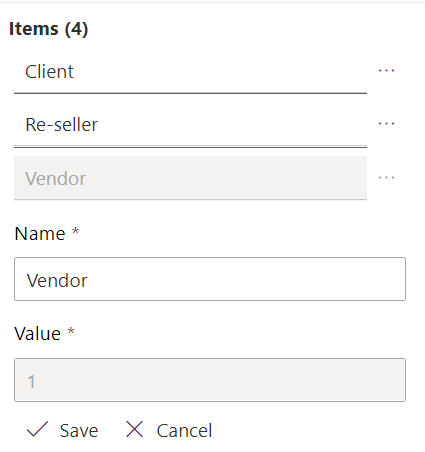
    This is the Choice we use as an example below:

    The “Re-seller” has to be removed. We need its value so we look it up to remember.

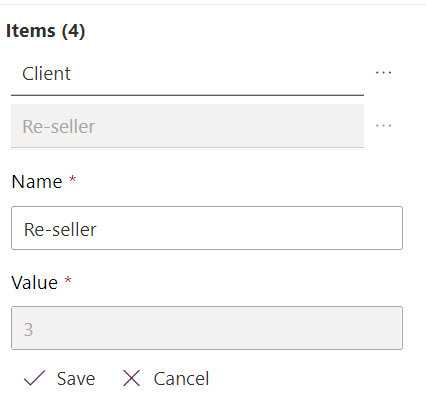
    We also need the Choice item which will be replacing “Re-seller”. In our case it’s “Vendor”.

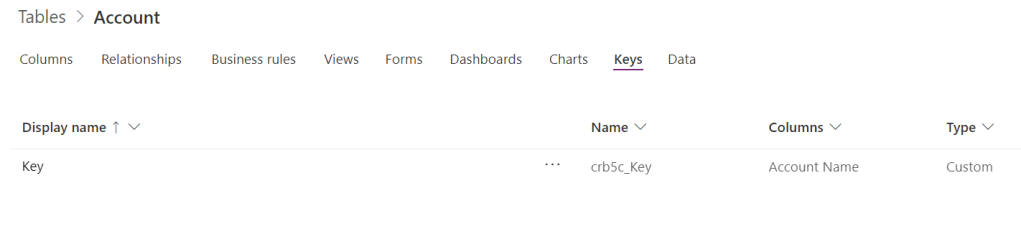
    You will need a Key for Account. I’ve chosen Account Name, in real life you can use Account Number or Code or anything which is unique column for your table in your organisation.

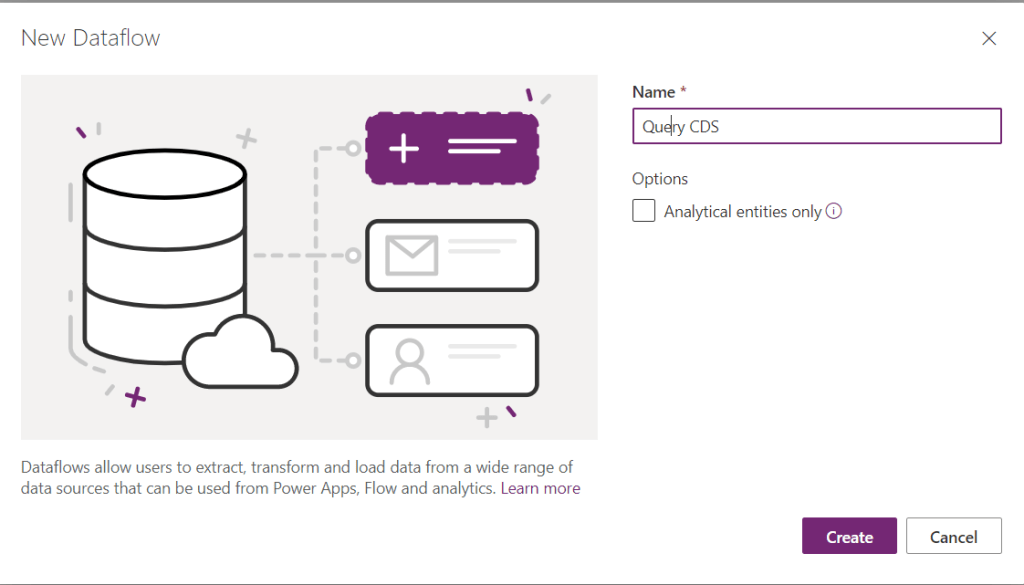
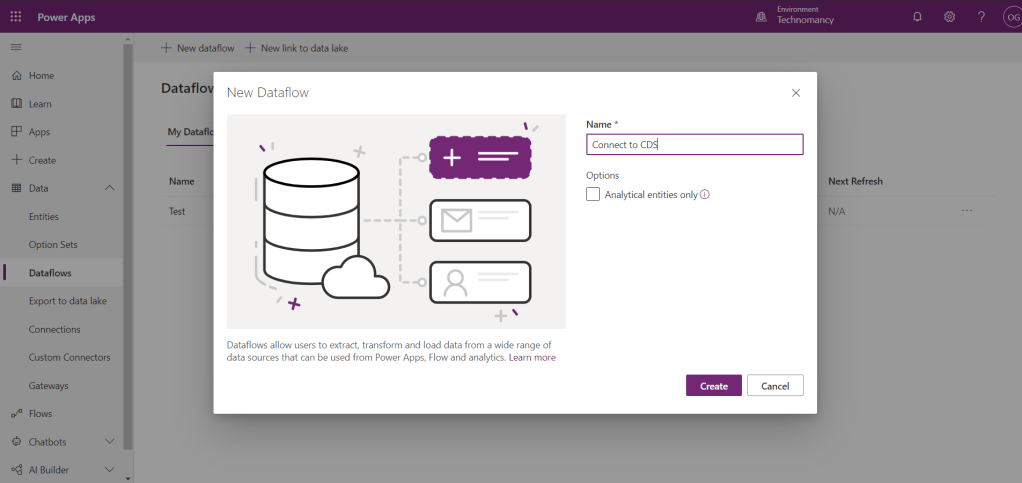
    On the maker portal under Data select Dataflow. We will be creating a new one.

    We need a Web API query only retrieving Account records with the Business Type we are trying to replace.

    So to make it easy we use my favorite tool, https://www.xrmtoolbox.com/plugins/Cinteros.Xrm.FetchXmlBuilder/ If you want to use any other tool or just create it manually you can do it as well.

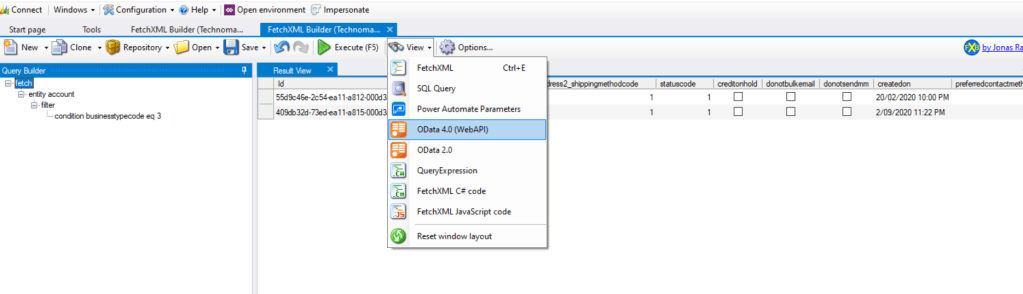
    My query looks like this one below.
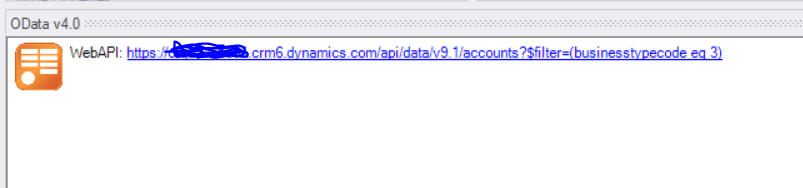
    https://<your_org&gt;.crm6.dynamics.com/api/data/v9.1/accounts?$filter=(businesstypecode%20eq%203)

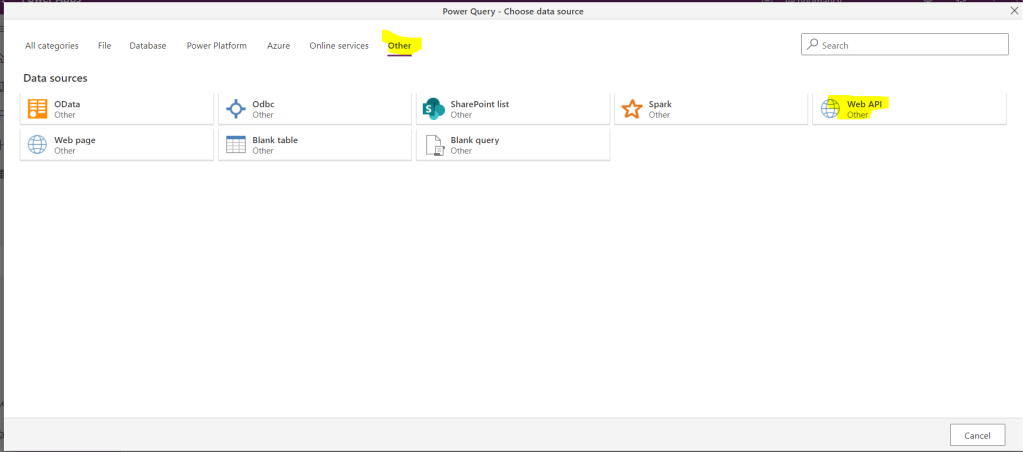
    In the Dataflow we will use Web API connected to CDS as a datasource.

    Copy to URL you constructed in FetchXmlBuilder in the Connection setting.

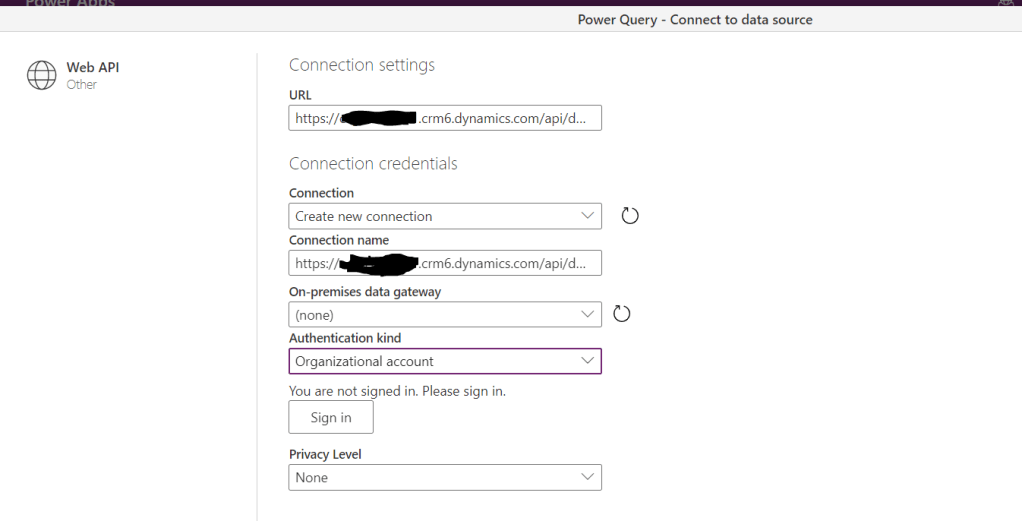
    Sign in with your account.

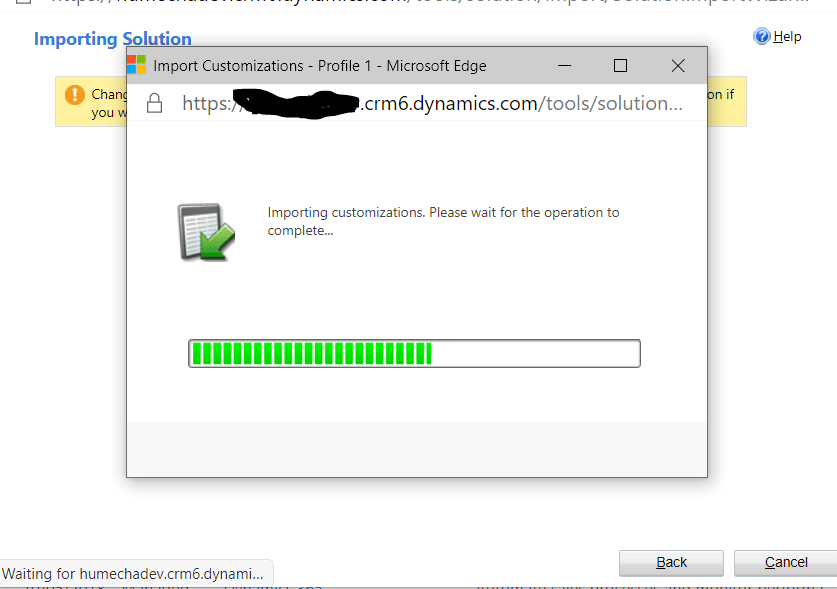
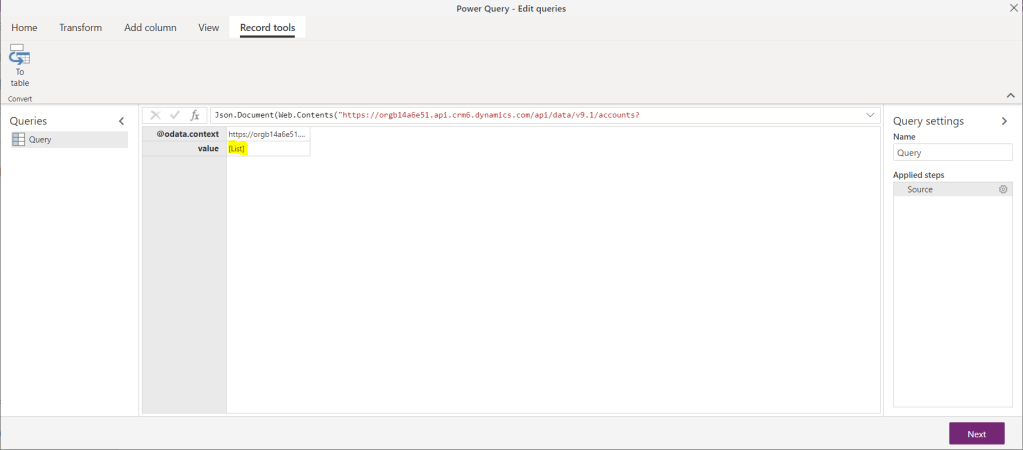
    Follow the steps I described in the article here to get to the stage below:https://wordpress.com/post/msolenacrm.blog/1580

    There are only 2 records because it’s a test data. It could be 100002 and it would make a perfect sense then.

    Let’s add a conditional column:

    Now we can move to mappings. The Destination table will be Account. We only have to map 2 columns: Name and Business Type.

    It’s very important to set the Name in the mapping because this field we use for the unique key.

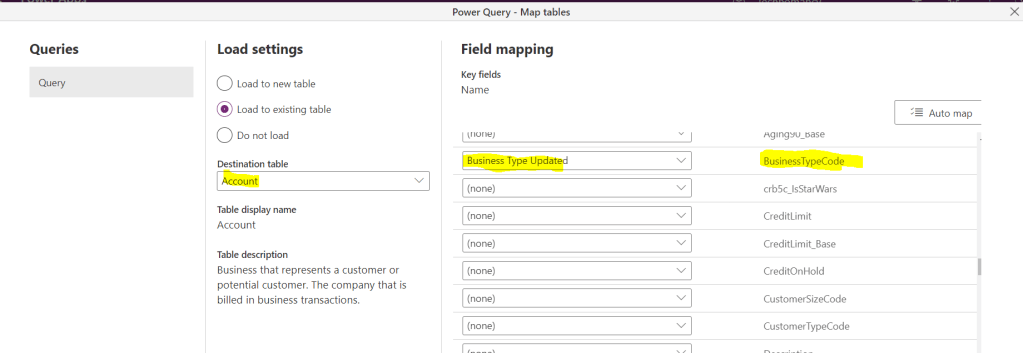
    Map Account Business Type to the conditional column we created. Click Next.

    This is the result below:

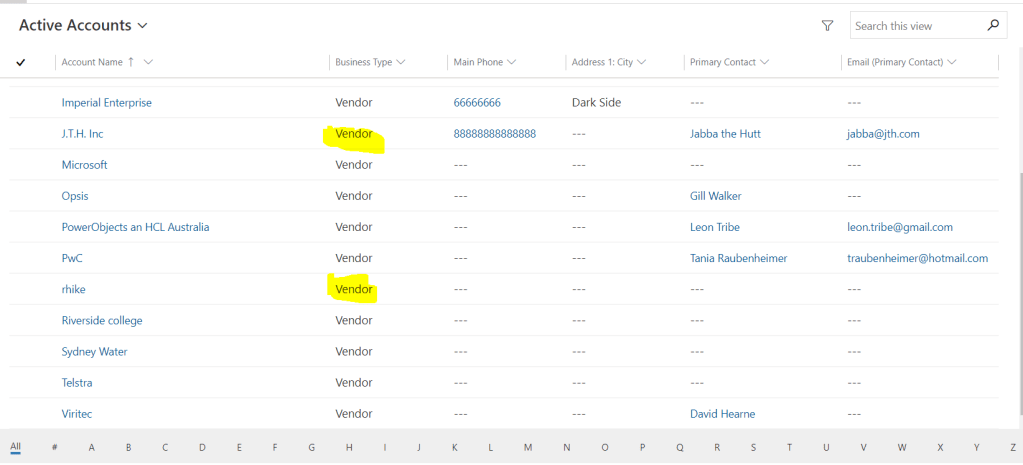
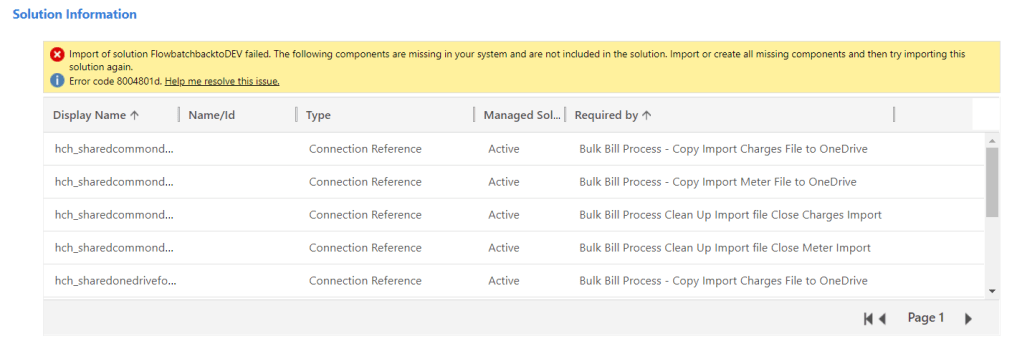
    There are no “Re-seller” columns left in the system so after checking any other dependencies you can safely remove it from your Choice field.

    Share this:

    • Share on LinkedIn (Opens in new window) LinkedIn
    • Email a link to a friend (Opens in new window) Email
    • Share on X (Opens in new window) X
    • Share on Facebook (Opens in new window) Facebook
    • Share on Telegram (Opens in new window) Telegram
    Like Loading…
  • Dataflow for Power Apps: query CDS with OData connector(improved)

    Dataflow for Power Apps: query CDS with OData connector(improved)

    October 26, 2020

    Recently I posted about the same issue: https://wordpress.com/post/msolenacrm.blog/1580 . Yesterday I discovered a new way. It looks like OData connector is more friendly than the Web API one.

    Use FetchXmlBuilder to help you to build the query.

    Start creating you Dataflow:

    For the data source on the tab Other pick up the OData connector.

    For the Connection String URL will be like: https://<your_org_name&gt;.crm.dynamics.com/api/data/v9.1/<your_query>

    But it look very appropriate now:

    Happy days!

    Share this:

    • Share on LinkedIn (Opens in new window) LinkedIn
    • Email a link to a friend (Opens in new window) Email
    • Share on X (Opens in new window) X
    • Share on Facebook (Opens in new window) Facebook
    • Share on Telegram (Opens in new window) Telegram
    Like Loading…
  • Import solution to CDS. Missing Connection references error…

    Import solution to CDS. Missing Connection references error…

    October 13, 2020

    In the morning i tried to bring back some stuff from UAT. When I tried to import my solution back to DEV I was getting errors. My solution contained Flows.

    Why do I use the classic admin interface to import solutions? Read this article: https://wordpress.com/block-editor/post/msolenacrm.blog/1608

    I went the classic interface to import the solution. I’ve got some connection references missing.

    I went back to the source environment to add the missing components.

    Make sure you added all you need. Because I haven’t.

    After adding the references your list of components will not change but don’t worry, they are there. Most likely.

    I had to add all the references to my solution because I didn’t remember which once I needed.

    After the third attempt:

    My top favorite screen ever! ;(

    Still warnings:

    Inside my Flow:

    But it seems to saves fine.

    Read more about connection references in the documentation here:

    https://docs.microsoft.com/en-us/powerapps/maker/common-data-service/create-connection-reference

    Share this:

    • Share on LinkedIn (Opens in new window) LinkedIn
    • Email a link to a friend (Opens in new window) Email
    • Share on X (Opens in new window) X
    • Share on Facebook (Opens in new window) Facebook
    • Share on Telegram (Opens in new window) Telegram
    Like Loading…
  • Dynamics 365 solution error - Components are missing, import the managed solution with these Components (Active)!

    Dynamics 365 solution error - Components are missing, import the managed solution with these Components (Active)!

    October 6, 2020

    I was importing my unmanaged solution then the error has occurred.

    I was using a new UI. After spending some unpleasant time researching and trying different things I came across this post in the Hosk’s blog:

    https://crmbusiness.wordpress.com/2020/06/02/dynamics-365-solution-error%e2%80%8a-%e2%80%8acomponents-are-missing-import-the-managed-solution-with-these-components-active/

    Thank you very much, Hosk, you are truly marvelous!

    I realized that I have to switch to the Classic interface to get a meaningful error.

    I did. I tried to import the solution using the Classic interface. I was missing one view in my solution. It took me 5 minutes to fix them re-import.

    Share this:

    • Share on LinkedIn (Opens in new window) LinkedIn
    • Email a link to a friend (Opens in new window) Email
    • Share on X (Opens in new window) X
    • Share on Facebook (Opens in new window) Facebook
    • Share on Telegram (Opens in new window) Telegram
    Like Loading…
  • ❤ Dataflow for Power Apps: query CDS via Web API❤

    ❤ Dataflow for Power Apps: query CDS via Web API❤

    October 6, 2020

    In my Dataflow you would like to query CDS data. This is how I you it.

    Click on New dataflow and enter the name.

    On the next screen on the tab Other select Web API.

    Go to your model-driven app Advanced Settings.

    Select Customizations -> Developer Resources.

    Copy Instance Web API Service Root URL.

    Paste the URL to Web API URL Connection settings. Select Authentication kind –Organisational account. Sign in.

    Click on Sign In. Then Next. Modify the query to the one you want to use.

    Use https://fetchxmlbuilder.com/ to help you with the complex (and simple queries).

    I used this one, for example:

    Json.Document(Web.Contents("https://orgxxxx.api.crm6.dynamics.com/api/data/v9.1/accounts?$filter=name%20eq%20%27Imperial%20Enterprise%27"))

    Click on the List link.

    Then on the Record

    Click on To table from the menu.

    Click on Transpose.

    Click on Use first row as headers.

    This is your record.Enjoy!

    Share this:

    • Share on LinkedIn (Opens in new window) LinkedIn
    • Email a link to a friend (Opens in new window) Email
    • Share on X (Opens in new window) X
    • Share on Facebook (Opens in new window) Facebook
    • Share on Telegram (Opens in new window) Telegram
    Like Loading…
Previous Page Next Page

Create a website or blog at WordPress.com


Loading Comments...
 

    • Subscribe Subscribed
      • Olena's Dynamics Blog (post-AI)
      • Join 60 other subscribers
      • Already have a WordPress.com account? Log in now.
      • Olena's Dynamics Blog (post-AI)
      • Subscribe Subscribed
      • Sign up
      • Log in
      • Report this content
      • View site in Reader
      • Manage subscriptions
      • Collapse this bar
    %d